Un modèle pour remplir votre jardin et votre salon de ces jolis lapins! Ce modèle est facile est rapide à faire, en un rien de temps vous aurez votre petit lapin prêt pour un cadeau ou pour agrandir votre collection au crochet. Le modèle est plutôt petit donc il peut facilement être fait avec des restes de laine que vous avez!
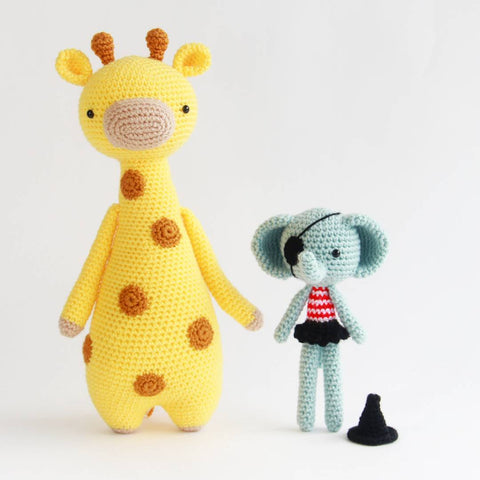
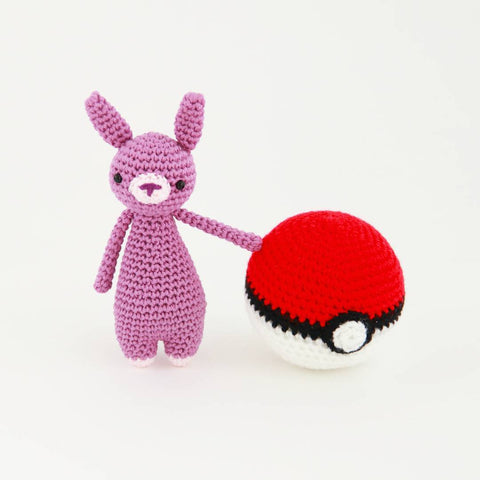
Pour le lapin en image, j’ai personnellement utilisé:
ms = maille serrée
aug = augmentation
dim = diminution
demiB = demi-bride
B = bride
mc = maille coulée
BAR = brin arrière uniquement
BAV = brin avant uniquement
arr = arrêter le fil
( … ) = répété ce qui se trouve entre parenthèse
[ .. ] = nombre total de mailles sur le rang
1. 6ms dans un cercle magique [6]
2. ( aug ) x 6 [12]
3. ( ms, aug) x 6 [18]
4. ( 2 ms, aug) x 6 [24]
5. ( 7 ms, aug) x 3 [27]
6-8. ms sur tout le rang [27]
9. ( 3 ms, aug) x 3, 15 ms [30]
10. ( 4 ms, aug) x 6 [36]
11-12. ms sur tout le rang [36]
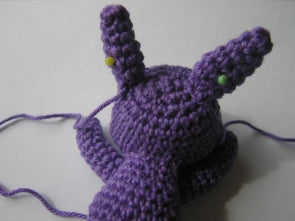
Placez les yeux entre les rangs 9 et 10 avec 6 mailles d’écart.
13. ( 4 ms, dim) x 6 [30]
14. ( 3 ms, dim) x 6 [24]
15. ( 2 ms, dim) x 6 [18]
16. ( ms, dim) x 6 [12]
17. ( dim ) x 6 [6]
Arr et cacher l’extrémité du fil.
1. 5ms dans un cercle magique [5]
2. ( ms, aug) x 2, ms [7]
3. ms sur tout le rang [7]
4. ( ms, aug) x 3, ms [10]
5. ms sur tout le rang [10]
6. ( 3 ms, dim) x 2 [8]
7. ( 2 ms, dim) [6]
Arr et garder une bonne longueur de fil pour l’assemblage. Ne pas rembourrer.
Coudre les 2 oreilles sur la tête. Assurez-vous que les oreilles soient dirigées vers l’avant de la tête, là où se trouve les yeux! Si vous préférez, vous pouvez également coudre les oreilles à la fin.
1. 6ms dans un cercle magique [6]
2. ( ms, aug) x 3 [9]
3. ms sur tout le rang sur le brin arrière uniquement! [9]
4-7. ms sur tout le rang [9]
Arrêter votre première patte. Ne pas arrêter la seconde!
Prendre les 2 pattes, continuer à crocheter en rond en commençant à partir de la dernière maille faite sur la seconde patte mais crocheter maintenant les mailles de la première patte. Une fois que vous avez fait 9 ms, continuer sur la deuxième patte et faites 9 ms. De cette façon, vos 2 pattes seront assemblées en un seul morceau contenant 18 ms.
1. suivez les instructions ci-dessus [18]
2. ms sur tout le rang [18]
3. 5 ms, ( aug, ms) x 5, 3 ms [23]
4. 8 ms, aug, 5 ms, aug, 8 ms [25]
5. ms sur tout le rang [25]
6. ( 3 ms, dim) x 5 [20]
Commencer le rembourrage des pattes et du corps et rembourrer petit à petit.
7-8. ms sur tout le rang [20]
9. ( 3 ms, dim) x 4 [16]
10. 9 ms, dim, 5 ms [15]
11. ms sur tout le rang [15]
Arr, ne pas fermer le trou, et laisser une bonne longueur de fil pour l’assemblage.
Le corps a une partie plate (le bas) et une partie ronde (le haut). Placer le corps et la tête sur une surface plate et placez les soigneusement l’un contre l’autre pour voir ce que cela donne. Epinglez-les ensemble avec quelques épingles lorsque vous êtes satisfait de la position de ceux-ci, puis les coudre.
1. 6ms dans un cercle magique [6]
2. ( 2 ms, aug) x 2 [8]
3-10. ms sur tout le rang [8]
Arr, rembourrer et laisser une bonne longueur de fil pour l’assemblage.
1. 4ms dans un cercle magique [4]
2. ( ms, aug) x 2 [6]
Arr, et laisser une bonne longueur de fil pour l’assemblage.
Coudre les bras sur le côté du corps, juste à côté de l’endroit où vous avez assemblez la tête et le corps. Coudre la queue sur la partie courbée du corps, vers le bas.
J’espère que vous avez aimé crocheter ce projet! Ce modèle sera toujours proposé gratuitement sur le blog. Cependant, si vous préférez télécharger une version PDF, vous pouvez l’acheter à tout petit prix ici. La version PDF combine le texte et les images dans un format plus simple à imprimer ou à sauvegarder sur son ordinateur, sa tablette ou son téléphone.
]]>Ce modèle est gratuit et se trouve juste ici sur le post du blog! Cependant, si vous préférez télécharger une version PDF, vous pouvez l’acheter à tout petit prix ici. La version PDF combine le texte et les images dans un format plus simple à imprimer ou à sauvegarder sur son ordinateur, sa tablette ou son téléphone.
Pour le chat de ce document, j’ai utilisé:
ms = maille serrée
aug = augmentation, faire 2 mailles serrées dans la même maille
dim = diminution, faire une maille serrée à partir de 2 mailles
demib = demi-bride
b = bride
mc = maille coulée
bar = Brin arrière uniquement
bav = brin avant uniquement
arr = arrêter le fil
( … ) = répété ce qui se trouve entre parenthèse
[ .. ] = Nombre de maille total sur le rang
+ Rembourrer bien fermement!
+ Faire des mailles très serrées, de façon à ce qu’aucun trou n’apparaisse lors du rembourrage. Vous pouvez faire cela en utilisant un crochet plus petit que la taille recommandée sur votre laine, et en tirant un peu sur le fil après chaque maille.
1. 6 ms dans un cercle magique [6]
2. ( aug ) x 6 [12]
3. ( ms, aug) x 6 [18]
4. ( 2 ms, aug) x 6 [24]
5. ( 3 ms, aug) x 6 [30]
6. ( 4 ms, aug) x 6 [36]
7-13. ms sur tout le rang [36]
14. ( 4 ms, dim) x 6 [30]
Placer les yeux de sécurité entre les rangs 10 et 11
15. ( 3 ms, dim) x 6 [24]
16. ( 2 ms, dim) x 6 [18]
Commencer à rembourrer petit à petit
17. ( ms, dim) x 6 [12]
18. ( dim ) x 6 [6]
Finaliser et fermer le trou. Laisse une bonne longueur de fil pour l’assemblage.
Avec du fil noir, broder le museau.
1. 4 ms dans un cercle magique [4]
2. ( ms, aug) x 2 [6]
3. ( aug ) x 6 [12]
Finaliser. Ne pas rembourrer, ne pas fermer le trou. Laisser une bonne longueur de fil.
Pliez les oreilles en formes plates. Cousez les oreilles sur le dessus de la tête.
1. 5 ms dans un cercle magique [5]
2. ms, aug, ms, aug, ms [7]
3-10. ms sur tout le rang
Finaliser la première patte, ne pas finaliser la deuxième !
Une fois la deuxième patte terminée, ne pas finaliser. Il faut maintenant assembler les 2 pattes qui seront le début du corps.
Continuer à partir de la seconde patte et faire 5 ml. Continuer depuis votre chainette et joindre la première patte, et faire des ms sur tout le rang (7 ms) de la première patte. Faire 5 ms sur un côté de la chainette que vous venez de faire et faire des ms sur tout le rang (7 ms) de la seconde patte. Continuer de crocheter sur la chainette et faire 5 ms de l’autre côté de celle-ci. Vous avez maintenant un rang complet de 24 ms au total et vous pouvez continuer de crocheter en rond.
1-5. ms sur tout le rang [24]
Commencer à rembourrer petit à petit
6. ( 7 ms, aug ) x 3 [27]
7. ms sur tout le rang [27]
8. ( 8 ms, aug) x 3 [30]
9-14. ms sur tout le rang [30]
15. ( 3 ms, dim) x 6 [24]
16. ( 2 ms, dim) x 6 [18]
Rembourrer de nouveau
17. ( ms, dim) x 6 [12]
16. ( dim ) x 6 [6]
Finaliser et fermer le trou. Cacher l’extrémité de fil.
Coudre la tête sur le corps, juste au-dessus de l’endroit où les 2 pattes ont été reliées.
1. 5 ms dans un cercle magique [5]
2. ms, aug, ms, aug, ms [7]
3-6. ms sur tout le rang [7]
Finaliser et rembourrer. Laisser une bonne longueur de fil.
1. 5 ms dans un cercle magique [5]
2-12. ms sur tout le rang [5] Finaliser et rembourrer si possible. Laisser une bonne longueur de fil.
Coudre les pattes arrière à l’arrière du corps. Coudre également la queue à l’arrière du corps, vers le bas. Pour positionner la queue dans la position que vous souhaitez, vous allez devoir ajouter un petit morceau de fil métallique dans la queue. Je le fais de la façon suivante: Prendre un morceau de fil métallique et plier-le en deux. Une extrémité sera courbée, c’est la partie qui sera dans la queue. Grace à la courbure, vous n’aurez pas de morceaux pointus qui ressortiront de la queue. Mesurer votre fil courbé et assurez-vous qu’il soit juste un peu plus long que l’intérieur de votre queue. De cette façon, si vous poussez le fil métallique dans votre queue, 95% seront dans la queue et 5% ressortiront. Puis pousser la queue dans l’arrière du corps de votre chat et assurez-vous que les 5% de fil métallique (avec les extrémités pointues) entre bien dans le corps. Puis, coudre la queue sur le corps de votre chat.
N’oubliez pas également de broder les adorables fesses de votre chat!
J’espère que vous avez aimé crocheter ce projet! Ce modèle sera toujours proposé gratuitement sur le blog. Cependant, si vous préférez télécharger une version PDF, vous pouvez l’acheter à tout petit prix ici. La version PDF combine le texte et les images dans un format plus simple à imprimer ou à sauvegarder sur son ordinateur, sa tablette ou son téléphone.
You will need:
You can pick any yarn you like, as long as you pick a matching crochet hook. Thicker yarn with a bigger hook will results in a larger hat. In the picture, the hat on the left was made with Paintbox Cotton DK and a 2.25 mm hook. It is 3 cm (1.2 inches) tall. The one on the right was made with DROPS Paris yarn and a 3.25 mm hook. It turned out to be 5 cm (2 inches) tall.
Crochet amigurumi witch hat pattern:
Round 1: 4 in a a magic circle [ 4 ]
Round 2: ( sc, inc) x 2 [ 6 ]
Round 3: (2 sc, inc) x 2 [ 8 ]
Round 4: (3 sc, inc) x 2 [10]
Round 5: (4 sc, inc) x 2 [12]
Round 6: (5 sc, inc) x 2 [14]
Round 7: (6 sc, inc) x 2 [16]
Round 8: (7 sc, inc) x 2 [18]
Round 9: in front loops only: (2sc, inc) x 6 [24]
Round 10: (3 sc, inc) x 6 [30]
Finish off and work away your thread. If you’d like to sew the hat onto your amigurumi, then use the thread to sew along round 9, where the curve of the hat starts.
A variation of this pattern first appeared in a Halloween pattern I designed for Furls in 2017. You can find the full pattern on Furls' website here. It has both a witch and a pirate costume option!
I hope you’ve enjoyed this pattern! Show me your results by posting your pictures on social media with the #littlebearcrochets tag, or tag or message me personally. Your creatures always brighten my day. 🙂
If you liked this pattern, please consider supporting me by purchasing one of my other patterns here. Thank you!
]]>You will need:
For the bear in the picture I personally used 4.5 mm eyes and a 2.25 mm hook. I also used KPC gossyp 4-ply yarn in the following colours:
Abbreviations:
sc = stitch
inc = increase
dec = decrease
hdc = half double crochet stitch
dc = double crochet stitch
sl = slip stitch
blo = back loop only
flo = front loop only
fo = finish off
( … ) = repeat whatever is in between the brackets
[ .. ] = total amount of stitches in that round
Head
Use white
1: 6 in a magic circle [ 6 ]
2: ( inc ) x 6 [12]
3. ( sc, inc) x 6 [18]
4. ( 2 sc, inc) x 6 [24]
5. ( 3 sc, inc) x 6 [30]
6-11. sc around [30]
12. (3 sc, dec) x 6 [24]
Place the safety eyes between round 8 and 9
13. (2 sc, dec) x 6 [18]
Slowly start stuffing as you crochet along
14. (sc, dec) x 6 [12]
15. (dec) x 6 [ 6 ]
Finish off and close. Work away your thread.
The snout is made in continuous rounds too, but it is started in an oval shape.
Snout
Use white
1. Start with a chain of 3 stitches
2. Sc in the second stitch of the chain. 3 sc in the next sc for the curvy edge. Continue onto the other side of the chain. Sc in the next stitch of the chain. 3 sc in the last space for the second curvy edge [ 8 ]
3. (sc, inc) x 4 [12]
4. sc around [12]
Finish off and leave a long thread.
With black embroidery thread, embroider a mouth and nose on the snout. The easiest way is to make repeated diagonal lines from top to bottom to one center point. Then even out the top of the nose by making one horizontal line. Complete it by making one small vertical line under the center point for a mouth.
Ear (make 2)
Use white
1. 6 in a magic circle [ 6 ]
2. (inc) x 6 [12]
3. sc around [12]
Finish off and leave a long thread.
Fold the ears into two flat pieces. Now sew the ears with a slight curve on top of the head.
Leg (make 2)
Use white
1. 6 in a magic circle [ 6 ]
2. (inc) x 6 [12]
3-12. sc around [12]
Finish off the first leg.
Do not finish off the second leg.
Merge the two rounds of the two legs into one round. Continuing from the last stitch you made in leg two, now sc around leg 1. After all 12 sc, continue onto leg 2 again and sc around. This makes one larger round of 24 sc in total.
Body
Continue from the two merged legs
1-2. sc around [24]
Stuff the legs
Switch to blue
3. sc around [24]
Switch to brown
4-6. sc around [24]
Switch to red
7. sc around [24]
Switch to blue
8. sc around [24]
Switch to red
9. (4 sc, dec) x 4 [20]
Switch to brown
Stuff the body while crocheting along
10. (3 sc, dec) x 4 [16]
11. (2 sc, dec) x 4 [12]
Switch to white
12. In back loops only: sc around [12]
Finish off and finish stuffing. Leave a long thread.
Reattach brown yarn at the back of the body, in one of the front loops that have become visible by crocheting round 12 in the body in the back loops only. The collar is worked in continuous rounds, going up like you did with all other pieces. The complete first round will be made in these front loops. The collar will form an extra layer around the neck and go up higher.
Collar
1. (3 sc, inc) x 3 [15]
2. (4 sc, inc) x 3 [18]
3. sc around [18]
Finish off and work away your thread.
Flip the collar over so the end of the neck and the collar are an even length. The top of the collar (round 3) will now be the bottom of the collar that is on the main body. See the illustration on the previous page.
Tail
Use white
1. 5 in a magic circle [ 5 ]
2. sc around [ 5 ]
Finish off and leave a long thread.
Arms (make 2)
Use white
1. 5 in a magic circle [ 5 ]
Switch to blue
2. sc around [ 5 ]
Switch to brown
3-8. sc around [ 5 ]
Finish off by pushing the last round of the arm towards
each other and closing the hole with two stitches across.
Sew the tail onto the lower back of the bear. Sew the arms to both sides of the body, at the top of the sweater but just below the collar. Be aware that you don’t accidentally sew the arms onto the collar!
Tip:
You can make these little bears in all types of colours, with many different coloured sweaters!
Did you enjoy the pattern? Please consider supporting me by purchasing one of my other patterns here. Thank you!
]]>
The second part can be found here:
Happy crocheting! 😉
]]>
Using the recommended yarn and hook, this bunny will turn out to be 20 cm (7.8 inches) tall. However, you can use any other type of yarn and matching hook size to make him bigger or smaller.
You will be crocheting in continuous rounds, which is the regular way to crochet amigurumi toys. If you’re not familiar with amigurumi, check out my blog post on how to start with amigurumi.
The abbreviations used are:
You will need:
30 grams of Diva Natural 100% Cotton in Cream
10 grams of Diva Natural 100% Cotton in Pastel Green
One pair of safety eyes of 6 mm
Stuffing
A single black thread
A single pink thread
Size 3.0 mm Clover crochet hook
Tapestry needle
Embroidery needle
For the bunny in the picture I personally used:
6 mm eyes
3.0 mm hook
Diva Natural 100% Cotton in Cream
Diva Natural 100% Cotton in Pastel Green
Tips:
+ Stuff really firmly!
+ Stitch very tightly, so no holes show when stuffing. You can do this by using a smaller hook than your yarn label recommends, and by pulling your thread a little after every stitch.
Head
Use white yarn.
1. 6 in a magic circle [6]
2. (inc) x 6 [12]
3. (sc, inc) x 6 [18]
4. (2 sc, inc) x 6 [24]
5. (3 sc, inc) x 6 [30]
6-11. sc around [30]
Put the eyes between row 8 and 9 with 6 stitches between them.
12. (3 sc, dec) x 6 [24]
13. (2 sc, dec) x 6 [18]
Start stuffing and keep stuffing while you crochet along.
14. (sc, dec) x 6 [12]
15. (dec) x 6 [6]
Fo and work away your thread.
Ear (make 2)
Use white yarn.
1. 6 in a magic circle [6]
2. (inc) x 6 [12]
3. (sc, inc) x 6 [18]
4-5. sc around [18]
6. (4 sc, dec) x 3 [15]
7. sc around [15]
8. (3 sc, dec) x 3 [12]
9. sc around [12]
10. (2 sc, dec) x 3 [9]
11. sc around [9]
Fo and keep a long thread for sewing. Don’t stuff.
Take your tapestry needle and sew the two ears on top of the head. Make sure the ears are facing towards the front of the head, where the eyes are! When you’re done, take your embroidery needle and black thread. Embroider a bunny’s nose in the middle of the face, a little below the eyes. Use the step-by-step embroidery drawing and the picture below as a reference.
Leg (make 2)
Use white yarn.
1. 6 in a magic circle [6]
2. (inc) x 6 [12]
3-14. sc around [12]
Switch colors to blue yarn.
15-17. sc around [12]
Fo your first leg. Don’t fo the second leg!
Take both your legs. You will continue crocheting around, starting from your endpoint at the second leg, but instead of crocheting another round on your second leg, continue crocheting around your first leg. Once you’ve done all 12 sc, continue once again on your second leg and make 24 sc around there. This way you will mend the two legs together and make one new large round of 24 sc. This will count as round 1 of the body.
Body
1. follow the instructions above [24]
2-3. sc around [24]
4. (dec, 10 sc) x 2 [22]
Switch colors to white yarn.
Start stuffing the legs and stuff the body as you crochet along.
5. sc around [22]
6. 5 sc, dec, 9 sc, dec, 4 sc [20]
7. sc around [20]
8. (dec, 8 sc) x 2 [18]
9. sc around [18]
10. 5 sc, dec, 7 sc, dec, 2 sc [16]
11. sc around [16]
12. (dec, 6 sc) x 2 [14]
13. sc around [14]
14. 4 sc, dec, 6 sc, dec [12]
Fo and leave a long thread for sewing.
Arm (make 2)
Use white yarn.
Stuff while crocheting along.
1. 6 in magic circle [6]
2-13. sc around [12]
Fold the top flat and sew the two sides together with 2 sc.
Fo and leave a long thread for sewing.
Tail
Use white yarn.
1. 5 in a magic circle [5]
2. sc around [5]
Fo and leave a long thread for sewing.
Now sew all the parts together. First sew the body and head together by using the thread of the body and your tapestry needle. Next sew the two arms to the sides of the body. Lastly, sew the tiny tail on the bunny’s back, in the middle of the lower half of the torso.
The last thing to do is to embroider the bunny’s belt. Take your pink thread and your embroidery needle. You enter the pants from the front, between the center crochet stitches. Now embroider around the top line of the pants. You will go over 1 crochet stitch, then under the next crochet stitch. Repeat this all around until you are at the front again. Exit through the entry hole. Tie a bow with the remainder of your thread.
You’re done! I hope you enjoyed working through this pattern. If you like this free pattern, you can support me by purchasing one or more of my patterns here. Thank you!
This pattern was originally published at Hobium's blog here.
]]>
Many people are having a great time with Pokémon GO, so here's something to take along on your travels! Enjoy! 🐾 😘
You will need:
For the ball in the picture I personally used:
Abbreviations:
sc = stitch
inc = increase
dec = decrease
hdc = half double crochet stitch
dc = double crochet stitch
sl = slip stitch
blo = back loop only
flo = front loop only
fo = finish off
( ... ) = repeat whatever is in between the brackets
[ .. ] = total amount of stitches in that round
Tips:
+ Stuff really firmly!
+ Stitch very tightly, so no holes show when stuffing. You can do this by using a smaller hook than your yarn label recommends, and by pulling your thread a little after every stitch.
Main ball
Start with red yarn
1. 6 in a magic circle [6]
2. ( inc ) x 6 [12]
3. ( sc, inc) x 6 [18]
4. ( 2 sc, inc) x 6 [24]
5. ( 3 sc, inc) x 6 [30]
6. ( 4 sc, inc) x 6 [36]
7. ( 5 sc, inc) x 6 [42]
8. ( 6 sc, inc) x 6 [48]
9-12. sc around [48]
Switch to black yarn
13-14. sc around [48]
Switch to white yarn
15-18. sc around [48]
19. ( 6 sc, dec) x 6 [42]
20. ( 5 sc, dec) x 6 [36]
21. ( 4 sc, dec) x 6 [30]
22. ( 3 sc, dec) x 6 [24]
23. ( 2 sc, dec) x 6 [18]
Start stuffing very firmly to get a round shape
24. ( sc, dec) x 6 [12]
25. ( dec ) x 6 [6]
Finish off and close
Button background
Use black yarn
1. 6 in a magic circle [6]
2. ( inc ) x 6 [12]
Finish off with a slip stitch
Button
Use white yarn
1. 6 in a magic circle [6]
Finish off with a slip stitch
If you enjoyed this free pattern and would like to support me, be sure to check out my other patterns!
]]>
You will need:
One small skein of yarn
A black thread
Polyester stuffing
One pair of safety eyes
Your favourite crochet hook
Your favourite sewing needle
For the cat in the picture I personally used:
4.5 mm eyes
2.25 mm (size B) hook
5 ply/sport weight yarn in white
Abbreviations:
sc = stitch
inc = increase
dec = decrease
hdc = half double crochet stitch
dc = double crochet stitch
sl = slip stitch
blo = back loop only
flo = front loop only
fo = finish off
( ... ) = repeat whatever is in between the brackets
[ .. ] = total amount of stitches in that round
Tips:
+ Stuff really firmly!
+ Stitch very tightly, so no holes show when stuffing. You can do this by using a smaller hook than your yarn label recommends, and by pulling your thread a little after every stitch.
Head
1. 6 in a magic circle [6]
2. ( inc ) x 6 [12]
3. ( sc, inc) x 6 [18]
4. ( 2 sc, inc) x 6 [24]
5. ( 3 sc, inc) x 6 [30]
6. ( 4 sc, inc) x 6 [36]
7-13. sc around [36]
14. ( 4 sc, dec) x 6 [30]
Place the safety eyes between row 10 and 11.
15. ( 3 sc, dec) x 6 [24]
16. ( 2 sc, dec) x 6 [18]
Slowly start stuffing while crocheting along.
17. ( sc, dec) x 6 [12]
18. ( dec ) x 6 [6]
Finish off and shut. Leave a long thread.
With some black thread, embroider the snout.
Ear (x2)
1. 4 in a magic circle [4]
This will be the top of the ear
2. ( sc, inc) x 2 [6]
3. ( inc ) x 6 [12]
Finish off. Don’t stuff or shut. Leave a long thread.
Now take both your ears and fold them in such a way that you have two slightly flat pieces. Sew them on top of the head.
Body
1. 6 in a magic circle [6]
2. ( inc ) x 6 [12]
3. ( sc, inc) x 6 [18]
4. ( 2 sc, inc) x 6 [24]
5-14. sc around [24]
Finish off. Stuff, don’t shut and leave a long thread.
Now take both your ears and fold them in such a way that you have two slightly flat pieces. Sew them on top of the head. Now take your head and place it on the big hole on top of the stuffed body. Carefully sew the body to the head.
Front leg (x2)
1. 5 in a magic circle [5]
2. sc, inc, sc, inc, sc [7]
3-11. sc around [7]
Stuff along the way. Close the top of the leg with 2 sc. Leave a long thread.
Sew the two front legs to the front of the body, with the part you closed with 2 sc just below the head.
Rear leg (x2)1. 5 in a magic circle [5]
2. sc, inc, sc, inc, sc [7]
3-6. sc around [7]
Finish off and stuff. Leave a long thread.
Sew the two tiny rear legs to the front of the body with the part you closed with 2 sc, but place them a little more towards the sides of the cat than the front legs. This creates stability, so it can sit on its own.
Tail
1. 5 in a magic circle [5]
2-12. sc around [5]
Finish off and stuff if possible. Leave a long thread.
Sew the rear legs on the bottom of the body. Also sew the tail at the back of the lower back. To be able to pose the tail to your liking, you’ll have to add a little piece of bendable metallic wire to the tail. I do this as follows: take a piece your wire of choice and fold it over. One end will have a curvy side, this is the end that will enter the tail. Because of the curvy side, no sharp endings will come sticking out of the tail later.
Measure your folded piece of wire, and make sure that it’s just a little bit longer than the inside of the tail. So, if you push the wire into your tail, 95% will be in the tail, 5% will be sticking out. Then, push the tail onto the back of the cat body, and make sure that the 5% of sticking out wire (with the sharp endings) enters the main body of the cat. Then, sew the tail into place on your cat.
Now you’re finished, congrats!
If you enjoyed this free pattern and would like to support me, be sure to check out my other patterns!
]]>